In this tutorial, I will show you how to animate using keyframes (start/end "frames" in a smooth animation). Like my last tutorial, I'll be using Sony Vegas Pro 10 for this.
Things To Note[]
- The keyframe method is really only good for basic scale/transformation/rotation animation.
- If you want to add rotation to your animation, do it all on the last keyframe.
- Multiple rotations of the same image are "recorded" between the start keyframe and the end keyframe.
- If you navigate to a frame that doesn't have a keyframe indicator on it, one will automatically be created if you adjust the image.
Tutorial[]
1. In Sony Vegas, load your .veg file (or start a new one if you do not have one).

2. Place and align your files. Make sure the thing you want to animate is in the correct track! (In this instance, the first track has the file we're going to add the keyframes to.)
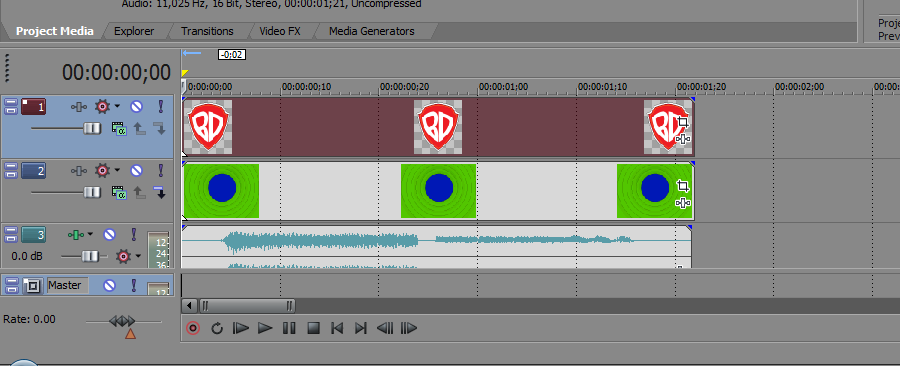
3. Click this icon. A dialogue will pop up.


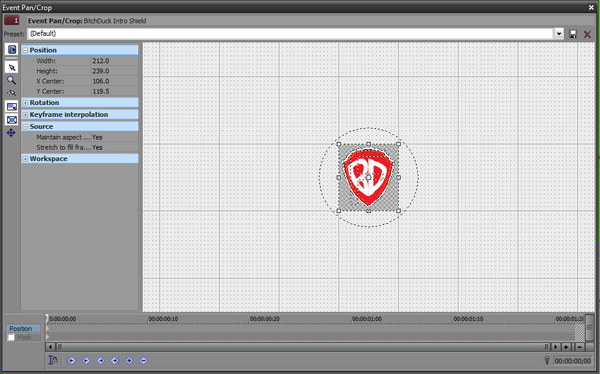
Something to note:
When you move the position bar in the Event Pan/Crop dialogue, the position bar on the timeline will move as well.
4. Navigate to the END of your animation (it doesn't have to be the length of the entire clip) and set a keyframe there.


5. Adjust this keyframe so that the image looks like what it should look like at the end of your animation.


6. Go to the keyframe that starts your animation. Set it to look as it should at the start.


7. Once that's done, press play and watch the animation!

Project Take Two Intro - 480p
This was the completed project-- a new intro for Project Take Two.